Data Access for ISAM User Manual - Installation
Installing Easysoft Data Access for ISAM
This section explains how to install, license and remove Easysoft Data Access for ISAM on supported Windows and Unix platforms.
The Windows installation can be carried out by anyone with local administrator privileges for the target machine.
The Unix installation assumes you are, or have available for consultation, a system administrator.
Chapter Guide
- Obtaining Easysoft Data Access for ISAM
- What to install
- Installing on Windows
- Uninstalling on Windows
- Installing on Unix
- Uninstalling on Unix
Obtaining Easysoft Data Access for ISAM
There are three ways to obtain Easysoft Data Access for ISAM:
- The Easysoft web site is available 24 hours a day at http://www.easysoft.com for downloads of definitive releases and documentation.
Select Download from the Easysoft Data Access for ISAM section of the website and then choose the platform release that you require.
First time visitors must complete the new user form and click Register. Note that your personal Internet options may require you to login and click Continue if you have previously registered.
- The Easysoft FTP server is available 24 hours a day at ftp://ftp.easysoft.com, containing free patches, upgrades, documentation and beta releases of Easysoft products, as well as definitive releases.
Change to the pub/eda-isam directory and then choose the platform release that you require.
- You can order Easysoft software on CD by email, telephone or post (see Contact Details).
What to install
The selection of components that you require to download in order to configure Easysoft Data Access for ISAM varies depending on the platforms on which you wish to run.
All installations must download the Easysoft Data Access for ISAM software itself.
The name of the Easysoft Data Access for ISAM install file varies from platform to platform, but is of the form:
where "x" is the major version number, "y" is the minor version number and "z" is the build index, which is incremented when minor changes are made.
"platform" will vary depending on the operating system distribution you require and you may come across files of the form:
within specific Unix platforms, where "platform-variation" refers to alternative versions available for a single platform.
|
Select the highest release available for your platform within your licensed major version number (installing software of a different major version number requires a new Easysoft license). |
Unix filenames may also be suffixed with .gz for a "gzipped" archive, .bz2 for a "bzip2ed" archive, or .Z for a "compressed" archive.
Cross-platform data access
If you intend to implement cross-platform data access, you also need to install either the Easysoft ODBC-ODBC Bridge (see http://www.easysoft.com/products/2002/main.phtml) for remote ODBC access or the Easysoft JDBC-ODBC Bridge (see http://www.easysoft.com/products/2003/main.phtml) for remote JDBC access from Java applications.
The Easysoft ODBC-ODBC Bridge consists of separate client and server components and the Easysoft JDBC-ODBC Bridge consists of a single server component.
|
You cannot 'mix and match' server and client components of the Easysoft ODBC-ODBC Bridge and Easysoft JDBC-ODBC Bridge. |
The following components are required for remote ODBC access to ISAM data:
- Easysoft Data Access for ISAM on the server platform
- the Easysoft ODBC-ODBC Bridge server component on the server platform
-
the Easysoft ODBC-ODBC Bridge client component on the client platform
The following components are required for remote JDBC access to ISAM data:
- Easysoft Data Access for ISAM on the server platform
-
the Easysoft JDBC-ODBC Bridge on the server platform
If you are using Windows 9x with either the Easysoft ODBC-ODBC Bridge or the Easysoft JDBC-ODBC Bridge you will need Winsock2, which can be downloaded from http://www.microsoft.com/windows95/downloads/contents/wuadmintools/s_wunetworkingtools/w95sockets2/.
Cross-platform data access software can be obtained as follows:
1. From the Easysoft Web site at http://www.easysoft.com:
For the Easysoft ODBC-ODBC Bridge:
- Obtain your required platform version for both client and server from the Multiple Platforms option on the Easysoft Data Access for ISAM Download page.
- Install the Client Download onto your client machine (on both Unix and Windows, you need to accept the Install ODBC-ODBC Bridge Client option and reject the Install ODBC-ODBC Bridge Server option).
This provides the Easysoft ODBC-ODBC Bridge Client.
On Unix you need to accept both the remote ODBC access and Install ODBC-ODBC Bridge Server options.
On Windows you also need to download the Easysoft ODBC-ODBC Bridge via the Multiple Platforms option, selecting your required server platform version, and install the Server Download on your server machine.
This provides the Easysoft ODBC-ODBC Bridge Server, the Easysoft ODBC-SQI SQL Engine and the Easysoft SQI-ISAM Driver.
For the Easysoft JDBC-ODBC Bridge:
- Obtain your required platform version from the Single Platform option on the Easysoft Data Access for ISAM Download page and install it on your server machine (on Unix you need to reject the Install OOB Server option).
This provides the Easysoft ODBC-SQI SQL Engine and the Easysoft SQI-ISAM Driver.
- Obtain your required platform version from the Easysoft JDBC-ODBC Bridge Download page and install it on your server machine.
This provides the Easysoft JDBC-ODBC Bridge.
2. From the Easysoft FTP site:
- for the Easysoft ODBC-ODBC Bridge both client and server components are contained in the same Easysoft ODBC-ODBC Bridge executable file held in the ftp://ftp.easysoft.com/pub/eda-isam/ directory.
- the Easysoft JDBC-ODBC Bridge server component is contained in the Easysoft JDBC-ODBC Bridge executable file held in the ftp://ftp.easysoft.com/pub/jdbc-odbc-bridge/ directory. There is no client component to install.
- the Easysoft ODBC-ODBC Bridge server component is bundled within the Easysoft Data Access for ISAM archive file held in the ftp://ftp.easysoft.com/pub/eda-isam/ directory.
- the Easysoft ODBC-ODBC Bridge client component is contained in the Easysoft ODBC-ODBC Bridge archive file held in the ftp://ftp.easysoft.com/pub/odbc-odbc-bridge/ directory.
-
the Easysoft JDBC-ODBC Bridge server component is contained in the Easysoft JDBC-ODBC Bridge archive file held in the ftp://ftp.easysoft.com/pub/jdbc-odbc-bridge/ directory.
Both client and server components are held in the same executable installation file for the Easysoft ODBC-ODBC Bridge. There is no specific client installation for the Easysoft JDBC-ODBC Bridge.
You can now download a file and begin the installation process.
Refer to the section relevant to your platform to continue:
Installing on Windows
1. Execute the file distribution that you downloaded in Obtaining Easysoft Data Access for ISAM.
|
Please shut down other Windows programs before installing. In particular, Microsoft Outlook can cause the installation routine to pause for several minutes when you start it. |
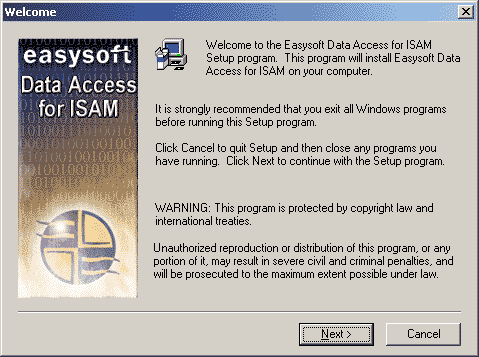
There will be a short delay while setup prepares the wizard to guide you through the rest of the install procedure before the Welcome dialog box is displayed:
The Software License Agreement dialog box then displays Easysoft End User licensing details:
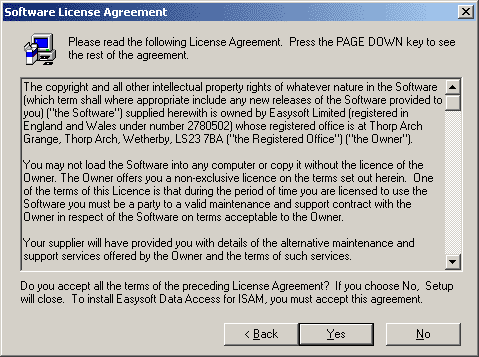
You are required to accept the terms of the License Agreement before continuing.
3. If you do not agree to the License Agreement, click No to exit the installation.
Click Yes to accept the License Agreement and continue with the installation.
The Information dialog box is displayed:

The User Information dialog box is displayed:
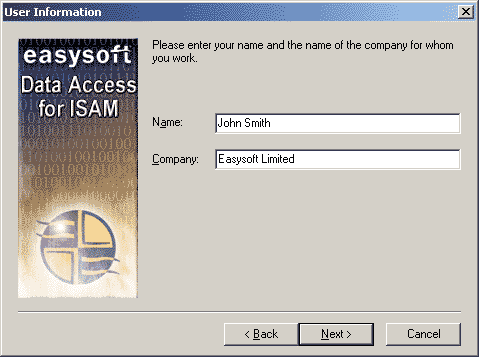
5. Enter your name and company name, then click Next to continue.
|
The name and company that you enter here will become the defaults in the License Manager later on. |
The Choose Destination Location dialog box is displayed:
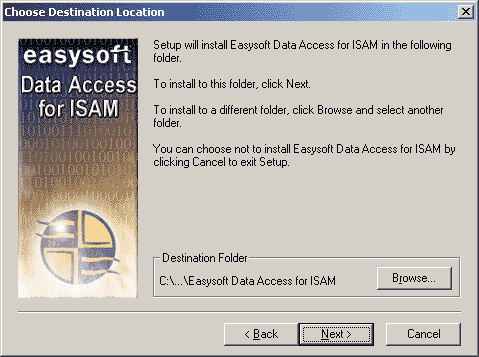
Choose the directory in which you want to install Easysoft Data Access for ISAM.
6. To accept the default, click Next.
To choose an alternative directory, click Browse to select the path you want, then click Next to continue.
There is now a short wait while the relevant Easysoft Data Access for ISAM components are copied and configured.
The Easysoft Data Access for ISAM dialog box is displayed, pre-configured to set up a data source connecting to a sample database:
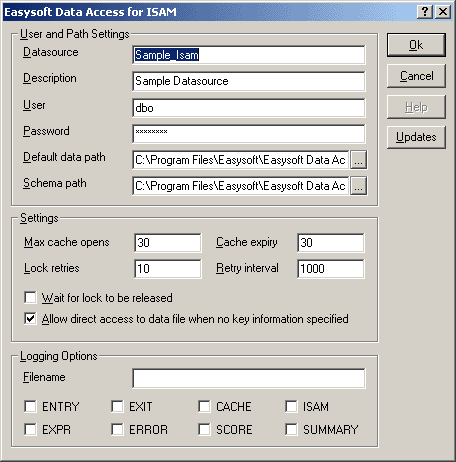
"Creating data sources" on page 60 explains how to create a data source to connect to your real ISAM data.
7. Click OK to create the sample data source and continue.
Licensing on Windows
The install program now starts the Easysoft License Manager (explained fully in the Licensing Guide).
The following types of license are available:
- a trial license which gives you free and unrestricted use of the product for a limited period (usually 28 days).
- a purchased license which gives you unrestricted use of the product. When you purchase the product, an authorization code is emailed to you.
The License Manager dialog box is displayed:
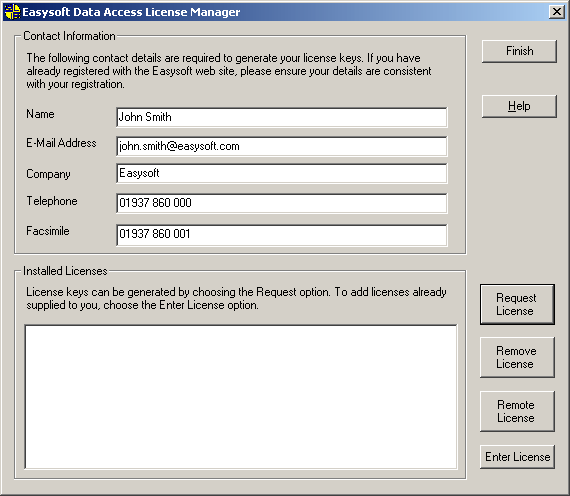
8. Enter your contact information.
You MUST enter the Name, E-Mail Address and Company fields.
The Telephone and Facsimile fields are important if you require Easysoft to contact you by those methods.
You are asked for a license type:
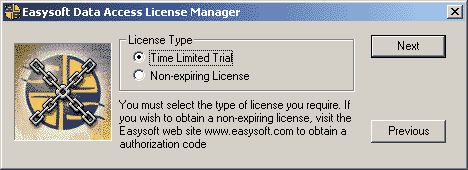
10. To obtain a trial license, click Time Limited Trial and then click Next:

Select Easysoft Data Access for ISAM and click Next.
If you have purchased the software and received an authorization code, select Non-expiring License and click Next:

Enter the authorization code and then click Next.
11. The License Manager displays a summary of the information entered and a choice of methods with which to apply for a license:
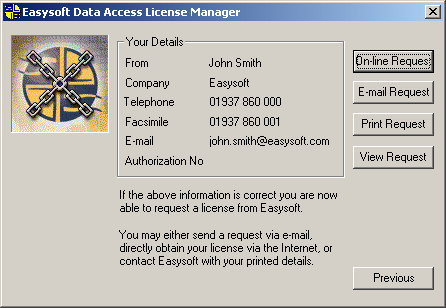
12. Choose On-line Request if your machine has a connection to the internet.
The License Manager then transmits a network packet to the license server at Easysoft. The whole process is automatic and you can proceed to step 13.
|
Only your license request identifier and contact details as they are displayed in the License Manager main screen are sent to Easysoft. |
The remaining three options (E-mail Request, Print Request and View Request) are all ways to obtain a license if your machine is offline (i.e. does not have a connection to the internet).
Each of these methods involves providing Easysoft with information including your machine number (a number unique to your machine) and then waiting to receive your license key.
Instead of emailing, faxing or telephoning your details to Easysoft, you can enter them directly onto the Easysoft web site and your license key will be emailed to you automatically.
To use this method, click View Request to display your machine number and then run a web browser and log on to the License Generator screen on the Easysoft web site at http://www.easysoft.com/sales/autolicense.phtml.
Choose the type of license you require, enter your machine number and then click Continue.
Your license key will now be emailed to you.
|
Licensing Easysoft Data Access for ISAM also obtains licenses for the Easysoft ODBC-ODBC Bridge and the Easysoft JDBC-ODBC Bridge. |
When you receive the license key, you can activate it either by double-clicking the email attachment or by clicking Enter License on the License Manager main screen and pasting the license key into the dialog box.
A message displays the number of licenses that have been added.
|
The E-mail Request option sends the license key to the email address as displayed on the License Manager main screen, not the from: address of your email. |
For more information about the licensing procedure, refer to the License Agreement.
13. Click Finish in the License Manager to return to the install program.
The Setup Complete dialog box is displayed:
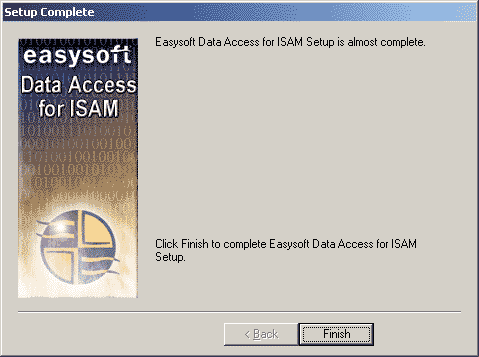
The Windows installation of Easysoft Data Access for ISAM is complete.
The install program will automatically create a SAMPLE_ISAM data source pointing at Easysoft sample ISAM test data (see step 7).
For details of how to link to this test data to check if the installation of Easysoft Data Access for ISAM has been successful, see "Querying a data source on Windows" on page 61.
The following menu options are installed under Start > Programs > Easysoft > Easysoft Data Access for ISAM:
Links to the Easysoft web site at http://www.easysoft.com.
Runs the Web Administrator (see "Using the Easysoft Web Administrator" on page 79 for further details).
Links to the License Help file and the License Manager.
15. You now need to install the client part of your method of connection if you are linking via the Easysoft ODBC-ODBC Bridge by copying the most recent version available from ftp://ftp.easysoft.com/pub/eda-isam/onto each client machine and running the install script.
You are recommended to choose the Custom installation, and select the client module only.
Please refer to the Easysoft ODBC-ODBC Bridge manual (ftp://ftp.easysoft.com/pub/docs/oob/edaoob.pdf) for details.
Uninstalling on Windows
To uninstall Easysoft Data Access for ISAM:
1. Select Start > Settings > Control Panel and then double-click the Add/Remove Programs icon.
A list is displayed of applications that can be automatically removed.
2. Select Easysoft Data Access for ISAM and click Add/Remove.
3. Click Yes to confirm that you wish to remove Easysoft Data Access for ISAM and all its components.
The system begins to remove all the components. If shared components seem not to be required, you will be prompted to decide whether or not to delete them.
4. If you feel confident with the registry (i.e. your system has had relatively few programs installed and removed) you should click Yes or Yes to All to continue.
If you have any doubts (e.g. uninstall procedures have failed in the past) you should click No or No to All.
The uninstall process removes Easysoft Data Access for ISAM components from your system.
5. Click OK to return to the Control Panel Install/Uninstall window.
6. The uninstall process is complete.
Installing on Unix
Although this section covers a range of platforms and the precise output may vary from system to system, the installation process is essentially the same.
Installation requirements
The Unix installation routine has the following requirements:
- The Bourne shell (or BASH) must either be named (or linked to) /bin/sh or the first line of the install file updated to the correct location.
- Various common Unix commands such as grep, awk, cut, ps, sed, cat, wc, uname, tr and find.
If any of these commands are missing they can be obtained from the Free Software Foundation (http://www.fsf.org).
- Depending on the platform, you will need up to 10Mb of free disk space for the installed programs and up to 10Mb temporary space for the installation files themselves.
Preparation
1. Log on to your Unix machine as the root user.
2. Download the Easysoft Data Access for ISAM (see Obtaining Easysoft Data Access for ISAM).
3. Place the distribution file in a temporary directory on your Unix machine.
Extracting the installation files
4. Change to the directory in which the distribution file resides.
5. Extract the installation files from the distribution file:
If the distribution file has been gzipped (i.e. the filename ends in .gz), then use:
gunzip eda-isam-x.y.z.platform.tar.gz
If the distribution file has been bzip2ed (i.e. the filename ends in .bz2), then use:
bunzip2 eda-isam-x.y.z.platform.tar.bz2
If the distribution file has been compressed (i.e. the filename ends in .Z), then use:
uncompress eda-isam-x.y.z.platform.tar.Z
6. If the distribution file has not been compacted at all (i.e. the filename ends in .tar), then it is ready for extraction:
tar -xvf eda-isam-x.y.z.platform.tar
The tar program creates a directory with the same name as the tar file (without the final .tar) containing further archives, checksum files, a script called install and a text file called INSTALL.
It also contains a versioned directory to ensure that any shared components already installed by other Easysoft products are only overwritten if those included in this distribution are newer.
|
If you do not wish to keep the original downloaded distribution file you can now delete it safely. |
7. Change into the newly-created xml-odbc-x.y.z-platform directory.
Beginning the installation
9. If you have read and agree to the Easysoft License Agreement, type yes and then press <Enter> to continue.
10. Specify the directory into which you want to install Easysoft Data Access for ISAM. If you accept the default base directory, the files are installed into a subdirectory called /easysoft within the specified path. For example, if you accept the default path of /usr/local, the files are installed into /usr/local/easysoft.
If you specify an alternative directory, the files are installed into that directory but a symbolic link is created from /usr/local/easysoft pointing to the install directory. This link is necessary for licensing to work.
11. Depending on the server platform, there may be more than one configuration of Easysoft Data Access for ISAM in the distribution file. If this is the case, you will be asked to choose the configuration that best suits your system.
12. Easysoft Data Access for ISAM requires an ODBC Driver Manager for Unix to be installed and includes one with your software. Details of the ODBC Driver Manager provided by Easysoft are displayed on screen, and if you do not already have one then unixODBC will be installed now. If you already have a version then you will be asked if you wish to overwrite it or to use your existing installed version.
Licensing on Unix
13. You are now asked if you want to obtain a license. Accept the default [y] to start the licensing procedure.
A menu of options is displayed.
14. Enter the number corresponding to Easysoft Data Access for ISAM.
By licensing Easysoft Data Access for ISAM, you also obtain a license for the Easysoft ODBC-ODBC Bridge and the Easysoft ODBC-SQI SQL Engine.
You will then be asked to provide some contact information.
17. Enter at least one of Email, Phone and Fax (preferably all three).
18. At the Ref prompt, do either of the following:
- If you want a trial license, leave it blank and press <Enter>.
- If you want a purchased license, enter your authorization code then press <Enter>.
19. The License Manager displays a menu of options for acquiring your license.
If you have an internet connection you should select 1, Automatic. This is the quickest and easiest method unless your firewall or other network obstacles prevent the message from getting through.
If you do not have an internet connection, or the Automatic option fails, select option 2 to write the required information to a text file in the current working directory called license_request.txt, which you will then need to view to obtain a license.
20. The License Manager displays the menu again. Select 0 to exit.
If you chose the automatic licensing method and licenses are retrieved, the licensing script outputs them to a file called licenses.out.
If the install script detects possible new licenses in the file licenses.out it asks whether you want to add them to the license database.
21. If you obtained licenses and you want to add them now, enter y.
If you did not obtain licenses, enter n.
If you do not see this message, then read on. You will need to complete the offline licensing procedure as explained in Completing the offline licensing procedure.
22. After the licensing is complete, the install program will ask you to confirm that you wish to install the empty [EASYSOFT_ISAM] and sample [SAMPLE_ISAM] data sources for Easysoft Data Access for ISAM.
It is recommended that both data sources are installed, especially [SAMPLE_ISAM], which is referred to elsewhere in the Easysoft Data Access for ISAM documentation.
odbc.ini is placed in the /etc directory by default and automatically updated with definitions of the [EASYSOFT_ISAM] and [SAMPLE_ISAM] data sources that are added.
23. You will now be asked whether or not to install the Easysoft ODBC-ODBC Bridge.
Enter y if you wish to provide remote ODBC access to your data.
24. Follow the defaults through the rest of the installation.
At the end of the install, information is displayed which describes the data sources which have been set up and explains how the installation can be verified by using the demosql SQL script provided with Easysoft Data Access for ISAM to query the sample data source (see "Querying a data source on Unix" on page 61).
A security notice is then displayed, which the user is recommended to follow by immediately updating the password for the default database owner ("dbo") which was created during the install.
If you wish to query the data source now, press <Enter> after you have finished to return to the system prompt.
|
You will not be able to query the sample data source if you have still to complete the offline licensing procedure. Complete the licensing, as explained in Completing the offline licensing procedure and then try running demosql. |
If you have more than one set of ISAM data, you can create more data sources by manually editing odbc.ini (see "Creating additional data sources on Unix" on page 70).
"odbc.ini settings for Unix" onpage 72 describes the settings must be specified for a data source before the data can be accessed.
Once you have installed Easysoft Data Access for ISAM you can run the Web Administrator to create users and set up their access rights to restrict access to the ISAM data (see "Using the Easysoft Web Administrator" on page 79).
25. You now need to install the client part of your method of connection if you are linking via the Easysoft ODBC-ODBC Bridge by copying the most recent version available from ftp://ftp.easysoft.com/pub/eda-isam/onto each client machine and running the install script.
You are recommended to choose the Custom installation and select the client module only.
Please refer to the Easysoft ODBC-ODBC Bridge manual (ftp://ftp.easysoft.com/pub/docs/oob/edaoob.pdf) for further details.
Completing the offline licensing procedure
If at step 19 you chose to write the licensing information to a file, you still need to complete the licensing procedure before Easysoft Data Access for ISAM can be used.
Licensing information is written to the license_request.txtfile, which contains information including a machine number (a number unique to your machine) which Easysoft require before a license key can be issued.
Licensing information which Easysoft require before a license key can be issued (including a machine number unique to your machine) is written to the license_request.txtfile.
1. Do any one of the following:
- Display the license_request.txt file (e.g. using
cat license_request.txt) and note the machine number. Now run a web browser and go to http://www.easysoft.com/sales/autolicense.phtml. Log in to the Easysoft web site. On the License Generator screen, choose the type of license you want, then enter your machine number and click Continue. You can now close the web browser. You will shortly receive your license key(s) via email. - Email the file license_request.txt to autolicense@easysoft.com. Your license key(s) will be emailed to you automatically.
- Email the file license_request.txt to license@easysoft.com. A member of the Licensing Department will email the license keys(s) to you.
2. When you receive your license key(s), append them to the file /usr/local/easysoft/license/licenses, removing any LIC: prefixes.
The Easysoft Data Access for ISAM is now licensed and you can begin using it.
If you need further information about licensing, please refer to the Licensing Guide.
Uninstalling on Unix
To uninstall Easysoft Data Access for ISAM:
- stop the Web Administrator if it is running (see "Using the Easysoft Web Administrator" on page 79).
- remove the <InstallDir>/easysoft/isam directory.
To stop the Web Administrator:
1. Log onto your Unix machine as root.
2. Change into the <InstallDir>/easysoft/isam directory.
when asked if you want to stop all HTTP administration servers.
|
If you do not stop the Web Administrator and then later perform another installation of Easysoft Data Access for ISAM then the installation may not be successful. |
To remove the <InstallDir>/easysoft/isam directory:
1. Change into the <InstallDir>/easysoft/isam directory.
to delete all the files and directories underneath the current directory.
to move back up one level in the directory structure.
to remove the isam subdirectory.
If you have installed the Easysoft ODBC-ODBC Bridge or the Easysoft JDBC-ODBC Bridge and you wish to uninstall one of them, please refer to the manual supplied with that product for details of its uninstall procedure.
Any licenses you obtain for Easysoft Data Access for ISAM and other Easysoft products are stored in the <InstallDir>/easysoft/license/licenses file, and unless you deleted this file after uninstalling you will not need to relicense Easysoft Data Access for ISAM when you reinstall or upgrade.
However, for security purposes you may want to make a copy of <InstallDir>/easysoft/license/licenses before uninstalling.